https://visualadventures.com/wp-content/uploads/2022/06/5.5x8.5frontcove2021-cmyk-c1-copysm.jpg800535jasonhttp://visualadventures.com/wp-content/uploads/2017/02/visual-adv-logo-2017-300x156.pngjason2022-06-30 21:11:042022-06-30 21:11:06Climbs of the Million Dollar Highway guidebook now available on Rakkup
https://visualadventures.com/wp-content/uploads/2022/06/Life-Below-Zero.jpg10801920jasonhttp://visualadventures.com/wp-content/uploads/2017/02/visual-adv-logo-2017-300x156.pngjason2022-06-30 19:58:382022-06-30 20:39:22Life Below Zero : BBC / Nat Geo
https://visualadventures.com/wp-content/uploads/2021/04/20200804_191819-scaled.jpg19202560jasonhttp://visualadventures.com/wp-content/uploads/2017/02/visual-adv-logo-2017-300x156.pngjason2021-04-28 15:40:282021-04-28 16:29:41A Collection of Favorite Pics from Southeast Alaska
https://visualadventures.com/wp-content/uploads/2021/02/13086775_607575402738236_1223263272846839738_o.jpg13652048jasonhttp://visualadventures.com/wp-content/uploads/2017/02/visual-adv-logo-2017-300x156.pngjason2021-02-10 16:04:582021-02-10 16:05:00Jason stars on the Enormocast
https://visualadventures.com/wp-content/uploads/2021/02/OIP_ChrisCrash-A7_00335.jpg15772500jasonhttp://visualadventures.com/wp-content/uploads/2017/02/visual-adv-logo-2017-300x156.pngjason2021-02-04 16:25:592021-02-04 16:32:32New Video on Dynamic Loading of Ice Screw Anchors
https://visualadventures.com/wp-content/uploads/2020/06/SnowInJune2020-06-14.jpg8831681jasonhttp://visualadventures.com/wp-content/uploads/2017/02/visual-adv-logo-2017-300x156.pngjason2020-06-14 15:35:082020-06-14 15:36:14Snow in June Drone Footage
https://visualadventures.com/wp-content/uploads/2019/05/Vuelo_Title.jpg10801920jasonhttp://visualadventures.com/wp-content/uploads/2017/02/visual-adv-logo-2017-300x156.pngjason2020-04-22 17:10:462020-04-22 17:10:47Vuelo de Fortuna film released!
 https://visualadventures.com/wp-content/uploads/2022/07/DSC07515-scaled.jpg
1710
2560
jason
http://visualadventures.com/wp-content/uploads/2017/02/visual-adv-logo-2017-300x156.png
jason2022-07-05 14:53:572022-07-05 14:54:59Long Exposure Fireworks, Ouray, Colorado
https://visualadventures.com/wp-content/uploads/2022/07/DSC07515-scaled.jpg
1710
2560
jason
http://visualadventures.com/wp-content/uploads/2017/02/visual-adv-logo-2017-300x156.png
jason2022-07-05 14:53:572022-07-05 14:54:59Long Exposure Fireworks, Ouray, Colorado https://visualadventures.com/wp-content/uploads/2022/06/5.5x8.5frontcove2021-cmyk-c1-copysm.jpg
800
535
jason
http://visualadventures.com/wp-content/uploads/2017/02/visual-adv-logo-2017-300x156.png
jason2022-06-30 21:11:042022-06-30 21:11:06Climbs of the Million Dollar Highway guidebook now available on Rakkup
https://visualadventures.com/wp-content/uploads/2022/06/5.5x8.5frontcove2021-cmyk-c1-copysm.jpg
800
535
jason
http://visualadventures.com/wp-content/uploads/2017/02/visual-adv-logo-2017-300x156.png
jason2022-06-30 21:11:042022-06-30 21:11:06Climbs of the Million Dollar Highway guidebook now available on Rakkup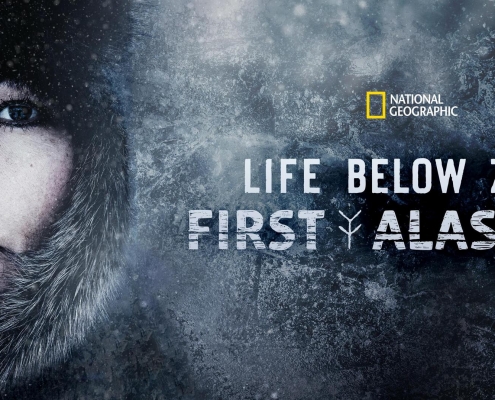 https://visualadventures.com/wp-content/uploads/2022/06/FirstAlaskans-scaled.jpg
1025
2560
jason
http://visualadventures.com/wp-content/uploads/2017/02/visual-adv-logo-2017-300x156.png
jason2022-06-30 20:50:102022-06-30 21:14:07First Alaskans : BBC / Nat Geo
https://visualadventures.com/wp-content/uploads/2022/06/FirstAlaskans-scaled.jpg
1025
2560
jason
http://visualadventures.com/wp-content/uploads/2017/02/visual-adv-logo-2017-300x156.png
jason2022-06-30 20:50:102022-06-30 21:14:07First Alaskans : BBC / Nat Geo https://visualadventures.com/wp-content/uploads/2022/06/Life-Below-Zero.jpg
1080
1920
jason
http://visualadventures.com/wp-content/uploads/2017/02/visual-adv-logo-2017-300x156.png
jason2022-06-30 19:58:382022-06-30 20:39:22Life Below Zero : BBC / Nat Geo
https://visualadventures.com/wp-content/uploads/2022/06/Life-Below-Zero.jpg
1080
1920
jason
http://visualadventures.com/wp-content/uploads/2017/02/visual-adv-logo-2017-300x156.png
jason2022-06-30 19:58:382022-06-30 20:39:22Life Below Zero : BBC / Nat Geo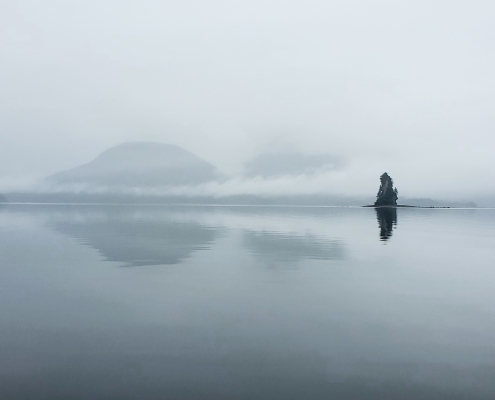 https://visualadventures.com/wp-content/uploads/2021/04/20200804_191819-scaled.jpg
1920
2560
jason
http://visualadventures.com/wp-content/uploads/2017/02/visual-adv-logo-2017-300x156.png
jason2021-04-28 15:40:282021-04-28 16:29:41A Collection of Favorite Pics from Southeast Alaska
https://visualadventures.com/wp-content/uploads/2021/04/20200804_191819-scaled.jpg
1920
2560
jason
http://visualadventures.com/wp-content/uploads/2017/02/visual-adv-logo-2017-300x156.png
jason2021-04-28 15:40:282021-04-28 16:29:41A Collection of Favorite Pics from Southeast Alaska https://visualadventures.com/wp-content/uploads/2021/02/13086775_607575402738236_1223263272846839738_o.jpg
1365
2048
jason
http://visualadventures.com/wp-content/uploads/2017/02/visual-adv-logo-2017-300x156.png
jason2021-02-10 16:04:582021-02-10 16:05:00Jason stars on the Enormocast
https://visualadventures.com/wp-content/uploads/2021/02/13086775_607575402738236_1223263272846839738_o.jpg
1365
2048
jason
http://visualadventures.com/wp-content/uploads/2017/02/visual-adv-logo-2017-300x156.png
jason2021-02-10 16:04:582021-02-10 16:05:00Jason stars on the Enormocast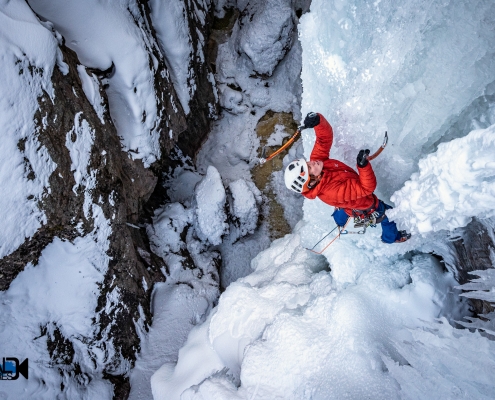 https://visualadventures.com/wp-content/uploads/2021/02/OIP_ChrisCrash-A7_00335.jpg
1577
2500
jason
http://visualadventures.com/wp-content/uploads/2017/02/visual-adv-logo-2017-300x156.png
jason2021-02-04 16:25:592021-02-04 16:32:32New Video on Dynamic Loading of Ice Screw Anchors
https://visualadventures.com/wp-content/uploads/2021/02/OIP_ChrisCrash-A7_00335.jpg
1577
2500
jason
http://visualadventures.com/wp-content/uploads/2017/02/visual-adv-logo-2017-300x156.png
jason2021-02-04 16:25:592021-02-04 16:32:32New Video on Dynamic Loading of Ice Screw Anchors https://visualadventures.com/wp-content/uploads/2020/06/SnowInJune2020-06-14.jpg
883
1681
jason
http://visualadventures.com/wp-content/uploads/2017/02/visual-adv-logo-2017-300x156.png
jason2020-06-14 15:35:082020-06-14 15:36:14Snow in June Drone Footage
https://visualadventures.com/wp-content/uploads/2020/06/SnowInJune2020-06-14.jpg
883
1681
jason
http://visualadventures.com/wp-content/uploads/2017/02/visual-adv-logo-2017-300x156.png
jason2020-06-14 15:35:082020-06-14 15:36:14Snow in June Drone Footage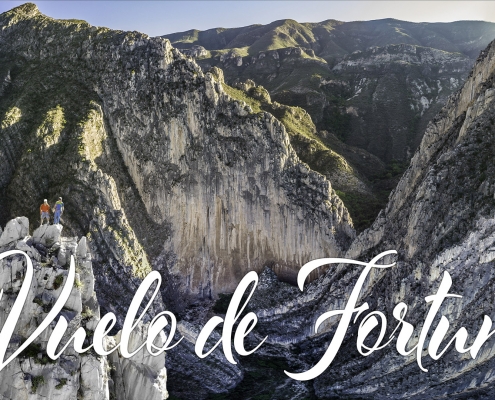 https://visualadventures.com/wp-content/uploads/2019/05/Vuelo_Title.jpg
1080
1920
jason
http://visualadventures.com/wp-content/uploads/2017/02/visual-adv-logo-2017-300x156.png
jason2020-04-22 17:10:462020-04-22 17:10:47Vuelo de Fortuna film released!
https://visualadventures.com/wp-content/uploads/2019/05/Vuelo_Title.jpg
1080
1920
jason
http://visualadventures.com/wp-content/uploads/2017/02/visual-adv-logo-2017-300x156.png
jason2020-04-22 17:10:462020-04-22 17:10:47Vuelo de Fortuna film released!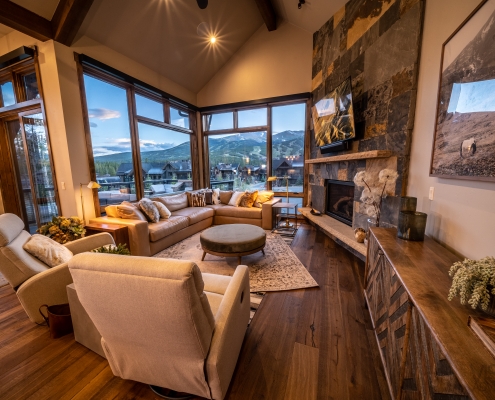 https://visualadventures.com/wp-content/uploads/2019/09/AE-BreckHouse20190830-CO0176-HDR-scaled.jpg
1707
2560
jason
http://visualadventures.com/wp-content/uploads/2017/02/visual-adv-logo-2017-300x156.png
jason2019-09-06 20:36:492019-09-09 15:19:09AE Designs in Breckenridge
https://visualadventures.com/wp-content/uploads/2019/09/AE-BreckHouse20190830-CO0176-HDR-scaled.jpg
1707
2560
jason
http://visualadventures.com/wp-content/uploads/2017/02/visual-adv-logo-2017-300x156.png
jason2019-09-06 20:36:492019-09-09 15:19:09AE Designs in Breckenridge